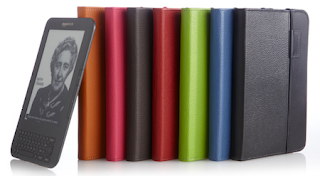
A Amazon disponibilizou hoje mesmo o empréstimo de ebooks kindle adquiridos na Kindle Store, para os clientes registados com morada dos Estados Unidos.
Assim, a partir de agora (desde que o editor não o proíba) pode emprestar os livros que tiver adquirido na Kindle Store.
O empréstimo é efectuado através do preenchimento de um formulário simples, que inclui o e-mail do destinatário do empréstimo.
O destinatário do empréstimo, que não tem de ter um Kindle (pode ter um iPad, iPhone, iPod Touch, Blackberry, equipamento Android, PC, Mac...) e tem 7 dias para aceitar o empréstimo; se não o fizer este caduca.
Se aceitar o empréstimo, este vigora durante 14 dias, período após o qual expira.
Cada livro só pode ser emprestado uma única vez.
Para já, repito, esta possibilidade apenas está disponível para clientes registados com morada Kindle nos Estados Unidos. Estes podem emprestar livros para clientes com morada noutros países, mas estes só poderão ler os livros se a leitura dos mesmos não estiver limitada pelos direitos de publicação do livro.
Podem saber tudo no link abaixo ou na imagem, para ir directamente à Amazon.
Empréstimo de Livros Kindle
- 1Create a picture you would like to add to your Kindle by using any image software. Window's Paint should work just fine for non-complicated images, but if you are skilled with advanced software such as Adobe Photoshop, you are at an advantage.
- 2Use image software to open your pictures when they are ready to be transferred onto the Kindle. Image software will help make your image compatible with the system or else it won't transfer properly.
- 3Set the maximum size of the image to 800 pixels high by 600 pixels wide. The image can be less than this size, but if is any bigger, it will not be read by the Kindle. Consult with your image software's user guide if you do not know how to set the image size. For Windows Paint, the image size can be set by clicking on "Resize" and entering the values into their designated box. Be sure to switch the resizing medium from "Percentage" to "Pixels."
- 4Save your image as either a GIF or JPG file extension once you are done creating your image. This option will be available to you when you select "Save As" and will be located on the bottom part of the window, underneath "File Name."
- 5Edit your image to a higher contrast if the file size is over 64 kilobytes, the maximum size for an image to be read by Kindle. Start by making the image into grey scale. In Windows Paint go to "Image Properties" and select "Black and white." Click "OK."
Another method of decreasing an image's file size, is to make the image size smaller. However, decreasing the image size may cause it to look a bit distorted and unclear on the Kindle, due to its high pixelation. - 6Attach the Kindle to your computer using a USB cable. Once the computer is able to read the device, open the Kindle files by choosing the appropriate option on the pop-out window or by selecting the device under "My Computer".
- 7Create a new folder named "Pictures." Open this new folder and create another folder named "My Pictures." Proceed to copy all of your newly created Kindle pictures from your computer to this new "My Pictures" folder.
- 8Disconnect your Kindle from the computer and go to its Home Screen. Press "Alt" and "Z" -- this will cause a new book called "My Pictures" to appear.
- 9Open your new "My Pictures" book and see if all your pictures were transferred properly. You can view each picture at a full page size by pressing "F." If you want certain pictures to be part of your screen saver, press "Alt," "Shift" and "0." After a brief loading period, you will be notified that that the selected image has been added to the screen saver.